How to nail buttons :
The button of your blouse fell right at the time of going out and you panic because you don’t know anything about sewing?
No mysteries.
Button nailing is the simplest thing in the world: just follow our tips.
parts
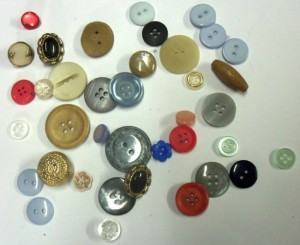
– Buttons
– Needle
– Clothes color line
– Piece of clothing
How to do it
Mark the place where the button will be
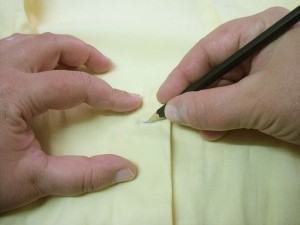
Extend the clothes on a table or some other comfortable place, so that the house(s) coincide exactly on the places where the buttons will be nailed.
If necessary, pin them around.
See as an example of an evangelica t-shirt with beautiful seams, in this same sequence
Use a pencil to mark inside the house where you will nail the button.
Attention: if the clothes are a shirt or other piece that has a row of buttons, it is necessary to mark them well before so that they stay in a perfect straight line.
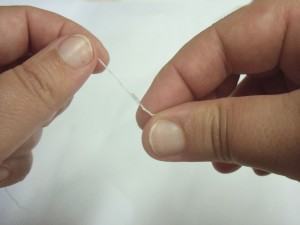
How to nail buttons – How to insert the thread in the sewing needle
Cut at least 45 cm of thread and thread the needle.
For those who have trouble threading through a needle hole, there is a small device that comes with the needle packs sold in the cupboards.
It is the thread taker.
Just run the thread through the wire loop and then thread it through the needle.
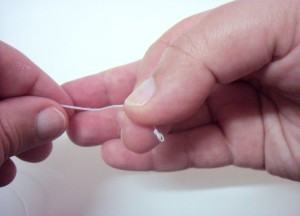
Make a knot at the end of the thread
Pull the line until the two ends match.
Wrap the two ends on the index finger at least three times, so that it forms a thin ring
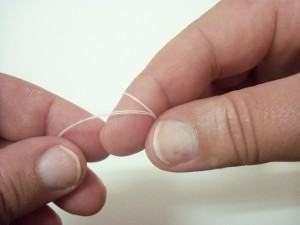
With your thumb, push this ring to the tip of the index finger, making the line roll.
Pull the line ring until it forms the knot.
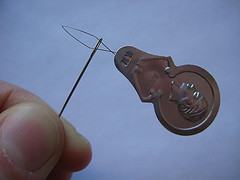
How to sew the 4-hole button
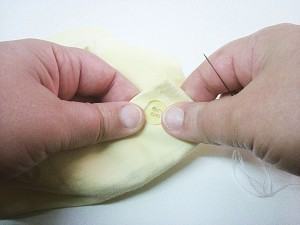
Thread the needle behind the stitch where you will sew the button (if you have difficulty, cross a pin before that stitch).
Pass the button through the needle and thread and position it well over the point where you marked it.
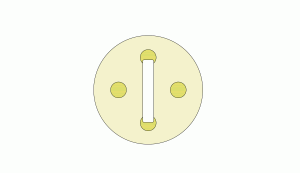
Since this button has four holes, we will position it so that two of the holes form a vertical line and the other two a horizontal line.
Let’s start with the holes in the vertical.
Pass the needle through one hole, then through the other to hold the button in place.
Pass the needle through the two holes several times, until you feel that the button is firm.
The thread should form a little bar, like in the drawing.
Note: always try to drill in the same stitches, so that the seam is clean on the reverse side.
Be careful not to tear the fabric in case it is a very thin cloth.
Another tip – if the fabric where you are sewing the button is a little thicker, do not sew the button too close to the cloth.
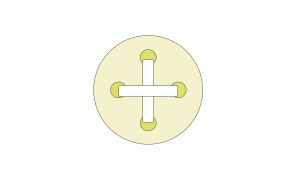
Leave some slack between the button and the cloth so that it is easy to button. Then do the same with the horizontal holes.
We could have started with them, whatever; what you should not do is give some stitches horizontally, then n the vertical one and go horizontal again; this gives a very ugly appearance to the stitches.
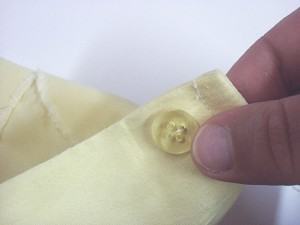
The end of the seam
To finish the seam, make at least five stitches behind the knot and cut close to the thread.
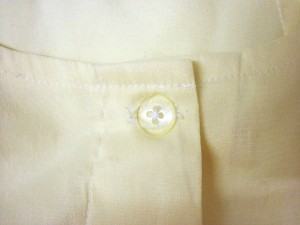
And here is the sewn button
Another way to sew 4-hole button
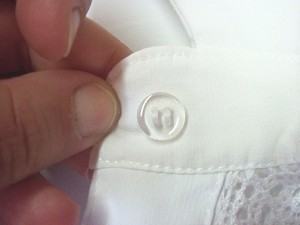
Another way of nailing a four-hole button: instead of positioning them to form a cross, the lines can be sewn in such a way that they are parallel lines.
The way to nail them is the same; it’s up to you.
How to nail buttons by hand – button selection
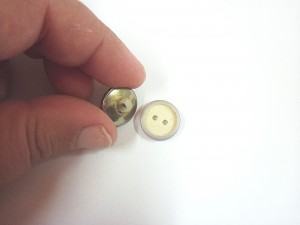
For buttons with only two holes, or the type that has a handle on the back, the way to make the points is the same, only with less work.
Usually two-hole buttons are nailed with horizontal dots, but it’s a matter of taste.
A little poem about the art of sewing
Word for word. I’m weaving a sense.
Cooking a structure, A sewing poem.
And with the poetry line. I punch the paper with a
Simple and sinuous writing. Taking, perhaps, a safe path.
Ergo the views. Looking in the space of the letters
A drawing that comes to my eyes. Imagination jumps out at me,
It assaults my thoughts.
And with the feather made needle. Hole in one point of the paper
Two words as a tie in the space that I represent,
A link in a single moment.
here you’ll get an idea of a beautiful birthday cake